Stripe allows individuals and businesses to make and receive payments over the Internet
using stripe users can pay with your debit/credit card
For accepting payment from stripe we need stripe keys, follow this link for more about stripe keys https://stripe.com/docs/keys
You can get your stripe keys here https://dashboard.stripe.com/
Follow the instructions closely and it will work smoothly!
Create and confirm your free Stripe account
Creating a Stripe account is free and you can delete it anytime. If you already have a Stripe account (for another project), it’s better to create a new one to avoid any interference.
Note that right now, once you have configured your Stripe account in your Sharetribe marketplace, you won’t be able to change it to another one. You can always update all details (bank account, account name…) in your Stripe dashboard but using another new account later isn’t possible for the time being.
To create your Stripe account:
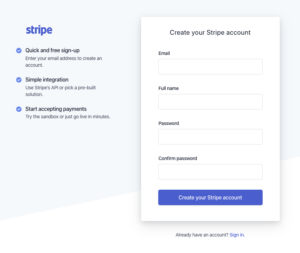
-
- Fill in the required fields, then create your Stripe account
Great! You can skip the first question by clicking “Skip for now” and you now have to confirm your Stripe email to confirm your account.
Confirm your Stripe account
To confirm your Stripe email and account:
- Check your email inbox and look for a confirmation email sent from Stripe (by support@stripe.com) named Confirm your Stripe email address!
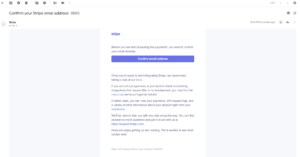
- Click the confirmation link in this email and log in with your credentials recently created

Yeah! Your Stripe account is now confirmed. You should now activate it to be able to receive money via this Stripe account.
Activate your Stripe account
As you will receive money from your users via your Stripe account, you have to provide some details such as your address and your bank account. This data is secured by Stripe and won’t be shared with anyone.
To activate your Stripe account:
- Log in to your Stripe account and click the Activate your account link in the left menu.
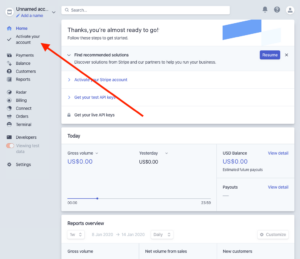
- Complete all the fields according to the instructions and set Your website to your Sharetribe marketplace address when asked. It’s OK to activate your account as an individual, you don’t need a company ID. Stripe may review your account later but you are able to activate it immediately.
- The activation form varies based on your country, so select that first!
- Any doubts or questions? Contact Sharetribe’s support.
- Once completed, click “Activate account”.
- Your Stripe account may still need to be reviewed by Stripe. It’s automatic, and it should be a very quick process.
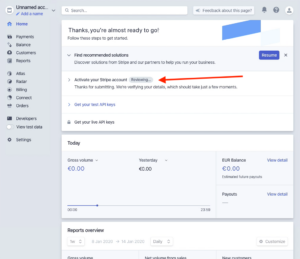
- After the automatic activation process, you may need to provide additional information to Stripe for identity verification. If you get this notification, click on “Review” on the dashboard as shown below. If you are not prompted for additional information, you can move to the next step.
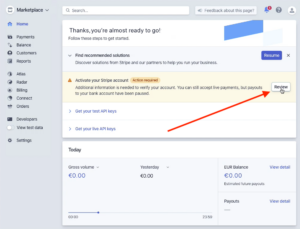
Good job! Now you need to enable Connect in your platform so your sellers can add their bank details in their settings.
Enable Stripe Connect in your platform
Sharetribe uses the Stripe Connect features with Custom Accounts and you have to enable it to enjoy those features.
This step is important: without this step, providers will not be able to receive money and buyers will not be able to start any transaction.
To enable Stripe Connect:
- Click the Connect left menu item.
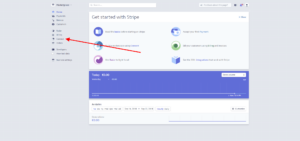
- Click the Get started button.
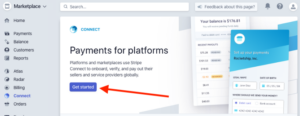
- Select “Build a platform or marketplace” from the prompt.
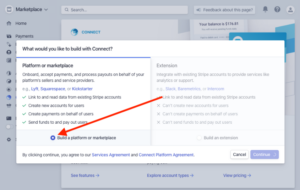
At this point, Stripe may have to review your account. If that’s the case, you can learn more about this process here.
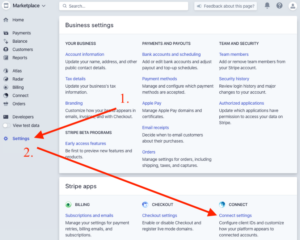
- After a few seconds of the review process, you should see your Connect dashboard. From the left sidebar, go to Settings then Connect settings, at https://dashboard.stripe.com/settings
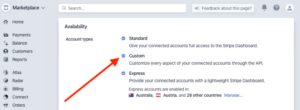
- Make sure that Custom is enabled in the Account types section.
- If you see a message on this screen that your platform profile needs to be completed, click “Start” on the notification and provide the additional information required.
- Stripe may still need to review your platform and account details. However, you can already move to the next step.
Great! You now have to get your API keys and input them into your marketplace.
Get your API keys from Stripe and add them to your Sharetribe marketplace
API keys are some text strings that have one technical purpose: link your Sharetribe marketplace with your Stripe account, so you can manage payments in your marketplace.
First, get your API keys from Stripe:
- Click “Developers” → “API Keys” in the left menu item.
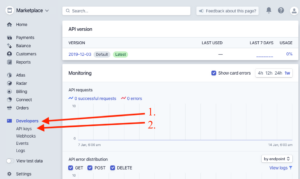
- Make sure that you are not using test data. If this is the case, switch the View test data toggle. Test API keys will not work in your Sharetribe marketplace.

- Copy the value from the Publishable key row, from the Token column. It should look like
pk_live_somelongrandomvaluelikeVqFze9etc - Go back to your Stripe account, in the API tab and click the Reveal live key token button.
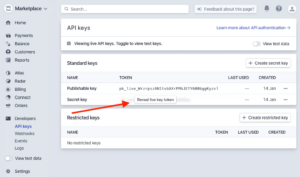
- A new window will pop up with the secret key. Note: You won’t be able to see the key again after this. Make sure you copy it and save it somewhere safe and private.
- Copy the value of the Secret key. It should look like sk_live_somelongrandomvaluelike0Rx3jvetc
- Paste this key Admin App payment section inside stripe keys
