Firebase gives you the tools to develop high-quality apps, grow your user base, and earn more money. We cover the essentials so you can monetize your business and focus on your users.
Let’s Integrate Firebase into your app
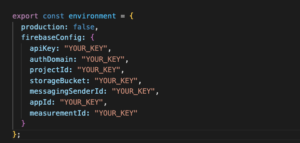
open environment.ts file in src/environment folder, here you can find two environment files, one is for debug mode and one is for production mode. you can set your credentials here for better security
Visit the Website for more about firebase and installation here
Now as you can see below image, we have set many credentials for various APIs
For firebase, You have to create a new Project
Open your browser and visit http://console.firebase.google.com
Login with your account in google account
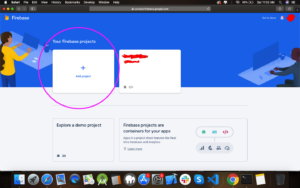
Now create a new project as you can see in the image below
Click on + to create a new project in firebase
Note All configuration is the same for all the projects so add these keys and credentials inside other project’s environment.prod.ts and in environment.ts file as well
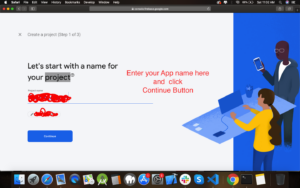
Next is to give the name of your project and click on the continue button
Now If you want to enable Google Analytics with your firebase project. then enable it as in the image, I recommended not enable this for now and clicking continue button.

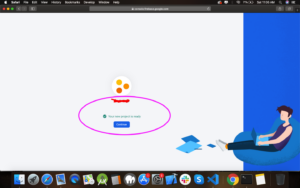
Your Project is now ready to use click on the continue button to navigate it to the firebase dashboard
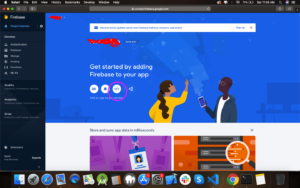
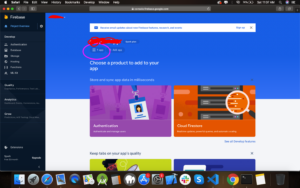
As you can see in the image below in the firebase dashboard. firebase provides much functionality on the left side of the image
For Our Application, we want firebase project credentials. so click on that button as shown in the image below
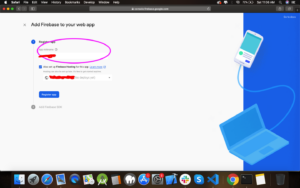
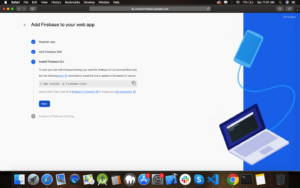
It will redirect to you on the setup page, here we are creating an app in firebase for credentials, so give your app name here and if you wish to upload your admin panel to firebase then check that button for firebase hosting and click Register Button
Click Next as we don’t require it.
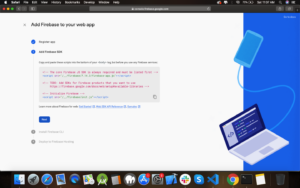
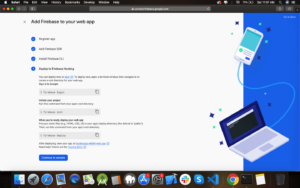
Click Next as we don’t require it.
No click on continue to console buttons for our app credentials.
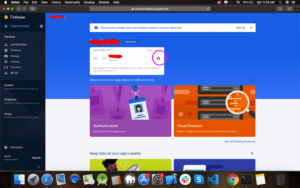
Our App is now ready to use as you can see there is one app available which we have recently created. now click on that app as you can see in the image below.
Now click on that Setting icon for credentials as Shown image below
You will be redirected to a new page with project settings and app credentials as you can see in the image below. scroll down and as you can see our recently created app is there
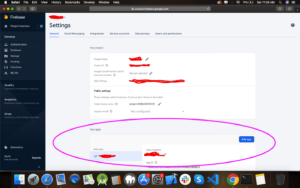
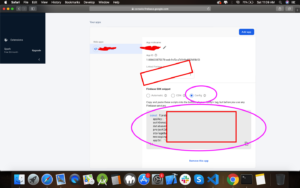
Now on the Firebase SDK snippet click on Config Buttons for firebase projects credentials. now copy and paste it to our environment file.
Note All configuration is the same for all the projects so add these keys and credentials inside other project’s environment.prod.ts and in environment.ts file as well.
Note All configuration is the same for all the projects so add these keys and credentials inside other project’s environment.prod.ts and in environment.ts file as well.
Note. This is Required
- Authentication
- Database
- Storage
1. Authentication
First, we will enable authentications for authorizing users
in order to do that let’s enable it by clicking on the authentication tab on the menu, left side of the dashboard as you can see in the image below
- Click on Authentication
- Click on Sign-in methods on tabs
- Click on Email/Password
- Enable Email/Password
- Click Save
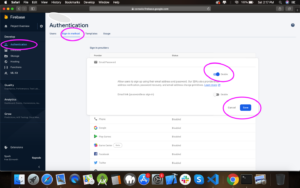
We are done with Authentication
2. Database
After Authentication, we have to set up a database for storing users
For that let’s enable database, by clicking on Database tabs on the menu left side of the dashboard as you can see in the image, now click on Create Database button for getting started.
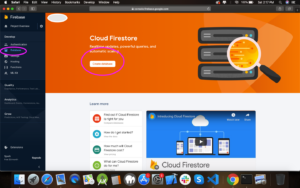
Next is to select database location, firebase will provide us with many locations of the database server, here select your nearest server, or choose it as from firebase. and click the Done button as you can see in the image below. wait for a minute it will create a database for us and will direct us to the database after successfully done.
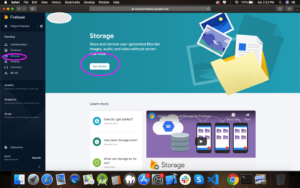
3. Storage
Last but not least step is to configure storage, for storing our images and other multimedia, in order to do that click on the Storage tab on the menu, left side of firebase dashboard. Click on Get started button to set up storage. as you can see in the image below.