Follow this Article https://medium.com/@alaa07996/firebase-push-notifications-with-flutter-6848892a1c15 For More About Notification With Firebase on Flutter
In this article I’ll explain how to connect your flutter app with firebase, enable Cloud messaging service and send your first notification!
Requirements (for IOS):
- Apple developer account
- Mac device with Xcode installed
- Iphone or Ipad (IOS simulators don’t receive firebase notifications)
First of all, create new project (if you haven’t already) in firebase by heading to Firebase console and press Add project
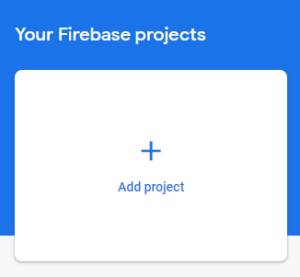
Then enter your project name and hit continue…
Keep going until you get into this page.
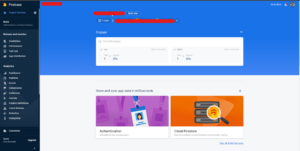
press the plus button to add a new app the select the android platform.
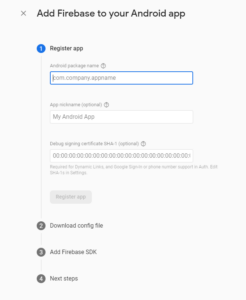
The only required field is the package name.
you can find your app package name in the AndroidManifest.xml file.
<manifest xmlns:android="http://schemas.android.com/apk/res/android"package="your_package_here">
Press Register app.
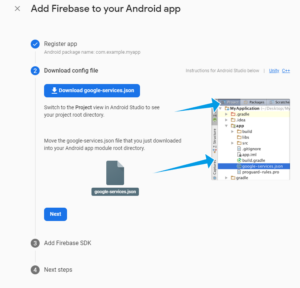
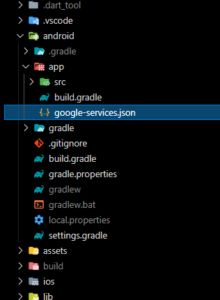
As the picture says, you need to download the google-services.json file and add to the directory show
Add Firebase SDK:
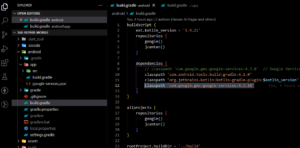
1- Add the classPath of google-services in build.gradle android file
dependencies {...classpath 'com.google.gms:google-services:4.3.10'
...}
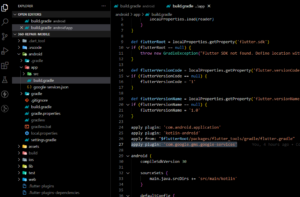
2- Add apply plugin of google-services to your build.gradle.app file
apply plugin: 'com.google.gms.google-services'
Now your app should be connected to firebase!
Not so fast, we haven’t told flutter how to handle the notification yet.
- Install firebase_messagingpackage to your app.
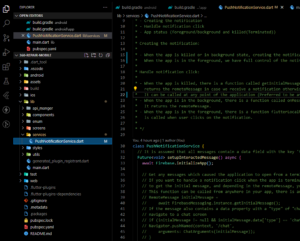
- Add the PushNotificationService.dart so that your app knows how to handle incoming notification.
This is a simple class I’ve created, it handles the notification and the press on it, you can customize this file as you wish.
But first you need to install the flutter_local_notifications | Flutter Package (pub.dev)
One last thing…
Add this to your <activity tag in AndroidManifest.xml file
...<intent-filter><action android:name="android.intent.action.MAIN"/><category android:name="android.intent.category.LAUNCHER"/></intent-filter>...<!-- Add below to ensure we get the payload when tapping on a notification --><intent-filter><action android:name="FLUTTER_NOTIFICATION_CLICK" /><category android:name="android.intent.category.DEFAULT" /></intent-filter></activity>
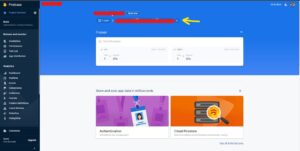
Now head to Cloud Messaging section in the Firebase Menu bar and enable it.
You can send your first message and see it in your app.
Make sure you uninstall the app from your device and install it again to make sure that everything you added has been applied to the app.
Remember, you can customize the notification and it’s press as you want, all you need to do is to go to PushNotificationService.dart file and add the logic you want.
If you’re an apple fan, don’t worry we’ll switch to apple right now.
Note: You can’t test the notifications in IOS simulator, so make sure you have a real device to be able to test it.
Note: you might run into an error when running the app in ios becuase of old version of pod.
[firebase_messaging] CocoaPods could not find compatible versions for pod “Firebase/Messaging”
Reference: Issue in Github
All you need to do is run this command.
pod repo update
Let’s add a new app for ios in firebase as we did in android.
Press add app, but select IOS this time.
Register the app by adding it’s details, the only required field is the IOS bundle ID which can be found in project.pbxproj file
PRODUCT_BUNDLE_IDENTIFIER = app_bundle_id;
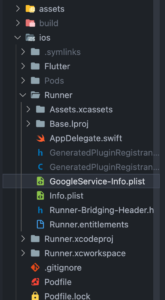
Press register and download the GoogleService-Info.plist file.
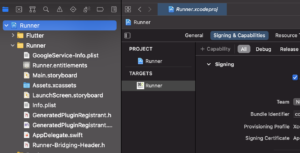
Paste this file inside the Runner folder.
We need to set a reference to GoogleService-Info.plist file in Xcode
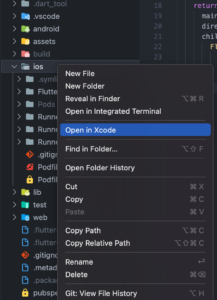
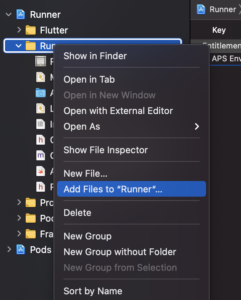
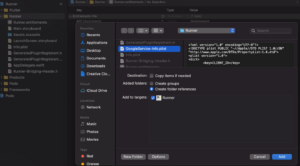
Select GoogleService-Info.plist file and press Add.
This will let Xcode know the refernece of the GoogleService-Info.plist file.
You’ll notice that Xcode will add the nessecary code to project.pbxprooj file, no need to worry about that, Xcode gets the job done for us.
Note: You won’t be able to receive a notification from firebase until you set the value of the FirebaseAppDelegateProxyEnabled to false
Add this code in the Info.plist file
...<key>FirebaseAppDelegateProxyEnabled</key><false/>...
There are some changes that need to be made in the AppDelegate.swift file in order to enable receiving notification in the ios app
import UIKit
import Flutter
import Firebase // Add this import@UIApplicationMain
@objc class AppDelegate: FlutterAppDelegate, MessagingDelegate  {
  override func application(
    _ application: UIApplication,
    didFinishLaunchingWithOptions launchOptions: [UIApplication.LaunchOptionsKey: Any]?
  ) -> Bool {
    FirebaseApp.configure()
    Messaging.messaging().delegate = self
    GeneratedPluginRegistrant.register(with: self)
    if #available(iOS 10.0, *) {
        // For iOS 10 display notification (sent via APNS)
        UNUserNotificationCenter.current().delegate = self
        let authOptions: UNAuthorizationOptions = [.alert, .badge, .sound]
        UNUserNotificationCenter.current().requestAuthorization(
                options: authOptions,
                completionHandler: {_, _ in })
    } else {
        let settings: UIUserNotificationSettings =
        UIUserNotificationSettings(types: [.alert, .badge, .sound], categories: nil)
        application.registerUserNotificationSettings(settings)
    }
    application.registerForRemoteNotifications()
    return super.application(application, didFinishLaunchingWithOptions: launchOptions)
  }
}
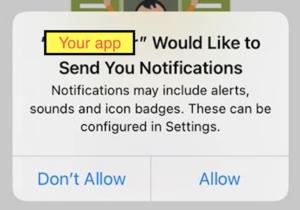
Now when the app runs, this dialog will show for the user, ofcourse if the user rejects, we won’t be able to send him notifications -_-
Almost there, just few more steps.
- Adding Team ID
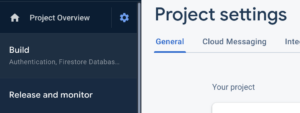
Go to firebase console => project settings (settings icon) and select your ios app under Your apps section.
Down there you will find Team ID
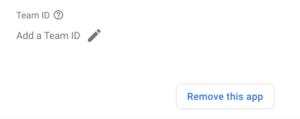
You can copy it from your developer account membership
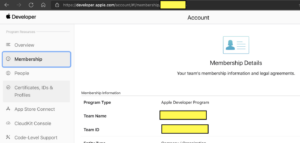
Remember to include the team in Xcode
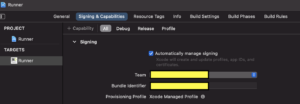
- Enable Push notification capabilities
Open Xcode to you project directory, press Runner => Signing Capabilities
Press the + Capability button
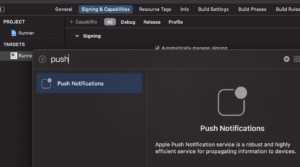
Double click on Push Notifications to enable Apple push notifications service.
- Include push notifications on
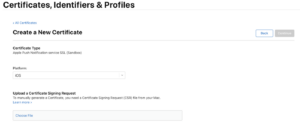
Go to Certificates, Identifiers & Profiles — Apple Developer
Select Identifires, find your app then scroll down to push notifications.
You will see Certificates (0) which means that no certificates have been added yet.
Press configure to add the required certificates (Developemnt and production SSL certificate)
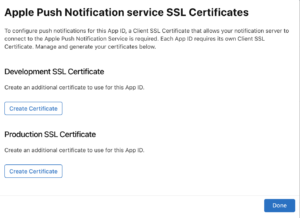
Let’s create the developemnt SSL certificate…
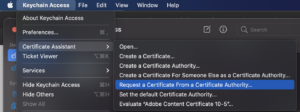
1- Press command + space to open Spotlight search and type Keychain Access
2- In the top left menu press Keychain Access => Certificate Assistant => Request a certificate From a Certificate Authority…
3- Enter the User Email Addres and common name, select Saved to disk
Leave CA Email Address empty.
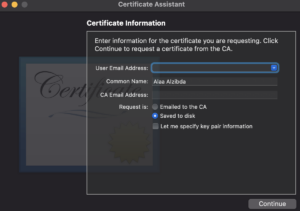
4- select where you want to save the certificate and show it in finer to upload it to apple developer account.
5- Press choose File and select the certificate you just created and press open.
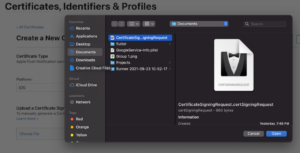
6- Press Continue
Now the Development SSL certificate is uploaded
Go back to your app, you will see Certificates (1)

Press edit and add the Production SSL certificate by doing the same steps you did in the Developemt SSL certificate.
After that, you will see Certificates (2) in the Psuh Notifications sections of your app.
The last thing you need to do is to create APNs Authentication Key
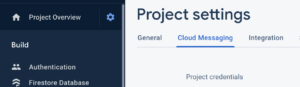
Go to Project settings => Cloud Messaging
In the iOS app configuration section, you will see APNs Authentication key.
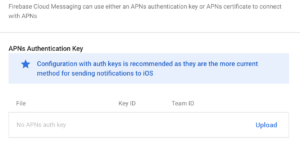
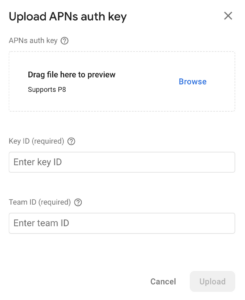
Press upload, this dialog will show up…
By default there will be no keys (I’ve already created the APNs key)
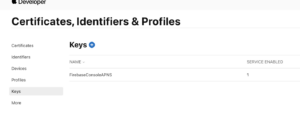
Press the plus icon to generate a new key
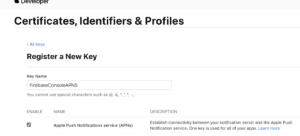
Name it as FirebaseConsoleAPNS and enable the Apple Push Notifications service (APNs) checkbox
Then you need to download the key.
Note: After you download the key, it gets deleted from apple servers, which means you can’t find it later, so make sure you back up that key (it can be downloaded only once).
If you lose it, you need to revoke the current one and create a new key then replace it in firebase.
Copy the key ID and paste it in the key ID box in firebase and upload the p8 key you just downloaded.
As you can see, Team ID already detected becuase we added it previously.
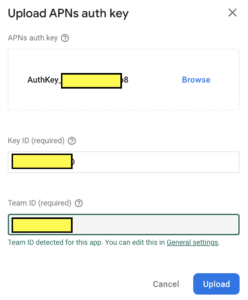
Press upload.
Now if you send a notification from firebase you will receive it in both platforms
Before you go, there’s one last thing.
If you want to send a notification for a specific user you need to use FCM token.
FCM stands for Firebase cloud messaging, it’s a token that gets generated by firebase for each user to use it for pushing notifications to them.